Viewing Cameras
Inspecting and viewing individual cameras
CaptureGRID provides several windows for working with cameras. The Dashboard shows a multi-camera overview (see Dashboard), and the Camera Controls window is for configuring settings and triggering (see Camera Control). This page covers the remaining two: the Cameras window for the tabular view of every camera the app knows about, and the Live View window for the real-time preview of what a single camera is seeing.
Cameras Window
The Cameras window shows every camera that the app knows about, in a table format. This includes cameras currently connected as well as cameras that have been seen before. Each row corresponds to one camera and shows its name, group, status, settings and other identifying information.
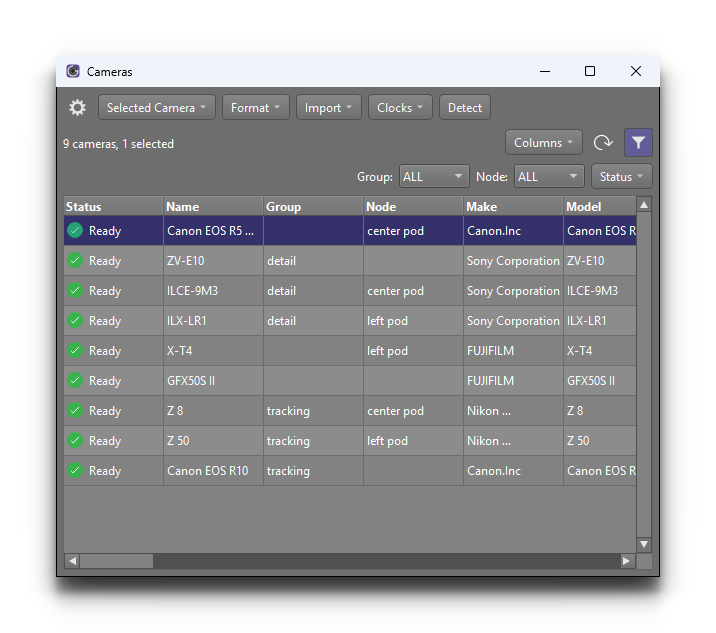
The window is useful when working with a large rig and you need detailed information about each camera in one place — for example, to check that all cameras have the expected aperture setting, or to identify a camera that has lost connection.
Filtering and Sorting
The Cameras window has a filter row at the top of the table that lets you narrow the visible rows. You can filter by:
Group — only show cameras in a particular group
Node — only show cameras connected to a particular Node
Status — only show cameras with a particular connection status
Column headings can also be clicked to sort the table.
Right-click Actions
Right-clicking a row opens a context menu with actions that apply to the selected camera. The most commonly used are:
Rename — set a custom name for the camera (stored against the serial number, so the name persists across reconnects)
Set Group — assign the camera to a named group, for use with the Dashboard’s group filter and the Camera Controls window’s Limit to group checkbox
Connect / Disconnect — control the connection to the camera
Identify — flash an indicator on the physical camera to help locate it in a rig
Selecting multiple rows before right-clicking lets the same action be applied to all of the selected cameras at once.
Live View Window
The Live View window shows a real-time preview from a single camera. This is the most common way to compose a shot, check focus, or verify that a scene looks the way you expect before triggering the camera.
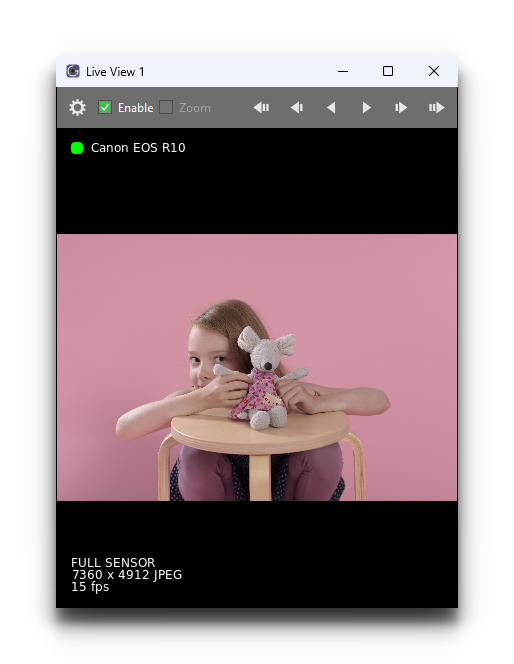
A Live View window can be opened for any connected camera that supports live view. The controls inside the window let you adjust focus, change the zoom level, and reposition the zoomed region.
Double-Click to Focus
Double-click anywhere in the Live View window to move the camera’s AF (autofocus) area to that point and focus there. This is quicker than dragging the AF area into place and then pressing Auto Focus.
When the view is zoomed in, it only shows the zoomed region, so a double-click recentres the zoomed region on the point you clicked and then focuses.
The AF area is always kept within the camera’s sensor, so a double-click near the edge of the frame moves it as far as it can go. If the camera cannot move its AF area, a double-click still focuses at the camera’s current AF point.
The Preview window works the same way when it is showing live view (see Live View in the Preview).
Multiple Live View Windows
CaptureGRID supports up to four Live View windows open at the same time. This is particularly useful when you need to monitor several cameras side by side — for example, to confirm that all cameras in a multi-camera capture are pointing where they should be.
Each Live View window can be configured independently. So one window can be showing a camera at full frame while another is zoomed in to check critical focus.
Tip
Live View can place noticeable load on the camera and the USB connection. If you are running a large rig, consider only enabling Live View on the cameras you are actively framing, and turning it off on the others.