Application Interface
How to arrange and save your window layout
The CaptureGRID interface is built around a docking system. The main application window hosts a large number of dockable panes — the Dashboard, Cameras, Camera Controls, Photos, Filmstrip, Preview, Live View, Loupe, Network, Session, Trigger Controls, Script Controls, Backup, Log, and so on. Each of these can be docked into the main window, floated as its own free-standing window, grouped into tabbed docks, or hidden entirely.
This flexibility is important because the right layout for a multi-camera shoot is rarely the same as the right layout for reviewing photos after the fact. The interface is designed to be arranged for the task at hand, and the result can be saved as a workspace so the same layout can be brought back later without re-arranging everything by hand.
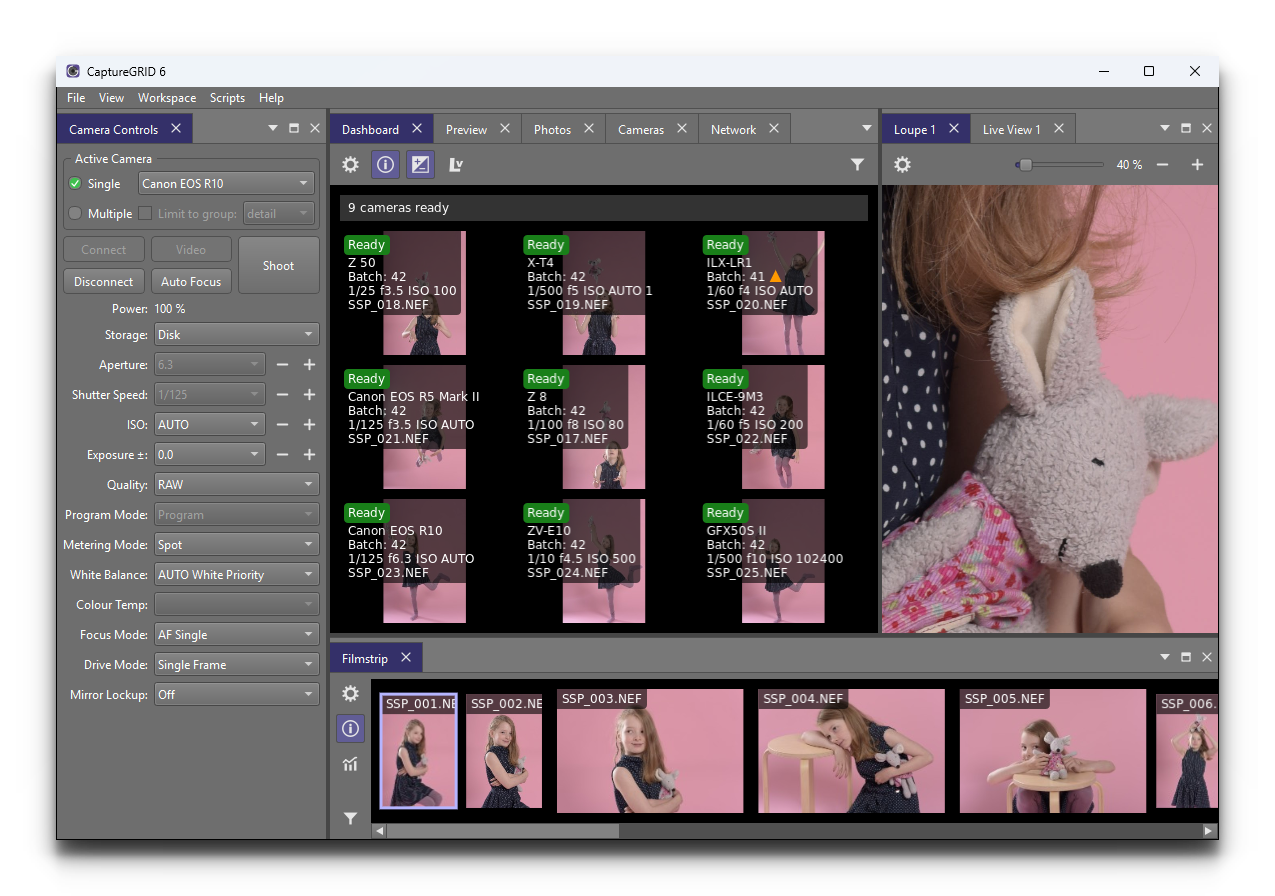
Showing and Hiding Panes
Every pane in the app can be opened or closed individually from the menu. The menu shows the full list of available panes — selecting one toggles it open or closed.
If a layout starts to feel cluttered, the simplest fix is to close the panes you are not currently using. They can be reopened any time from the same menu.
Docking and Floating
Each pane has a title bar at the top. Dragging the title bar lets you move the pane:
Dock — drop the pane onto one of the dock zones at the edge of the main window (top, bottom, left, right) or onto an existing docked pane to share the same area
Float — drop the pane away from any dock zone to leave it as a free-standing window. Floating panes can be moved to a second monitor, which is useful when working with multiple displays
Re-dock — drag a floating pane’s title bar back to a dock zone to attach it again
Docked panes can be resized by dragging the splitter bar between adjacent panes.
Tabbed Docks
When a pane is dropped onto an existing docked pane (rather than onto a dock zone at the edge), the two panes share the same area and appear as tabs at the bottom of the dock. This is a useful way to keep related panes available without using more screen space — for example, the Photos table and the Filmstrip can occupy the same area, with a tab to switch between them.
Workspaces
A workspace is a saved snapshot of the current window layout — which panes are open, where they are docked, how they are sized, and which tabs are grouped together. Workspaces let you build a layout once and switch between them as the task changes.
All workspace actions are available from the menu.
- Save Workspace
Save the current layout as a named workspace.
- Switch Workspace
Open a submenu showing all saved workspaces; selecting one restores its layout.
- Delete Workspace
Remove a saved workspace.
- Reset Workspace
Restore the layout to the app’s default arrangement. Useful when a layout has been changed in a way that is hard to undo.
Tip
A common pattern is to save two or three workspaces aligned with your most common tasks — for example, one Capture workspace that prioritises the Dashboard, Live View, and Camera Controls, and one Review workspace that prioritises the Filmstrip, Preview, Loupe, and Photos table. Switching between them is then a single click.
Default Focus
When the app starts, the Dashboard is given default focus. This
ensures that the multi-camera overview is the first thing you see,
and that keyboard shortcuts such as F5 (take photo) or F6
(auto focus) act on the cameras visible in the Dashboard. For more
on the Dashboard, see Dashboard.
Keyboard Shortcuts
Many actions can be done from the keyboard. Camera actions, such as taking a photo or changing a camera setting, act on the active cameras (see Active Camera). Photo actions act on the photos selected in the Photos table or Filmstrip.
The shortcuts work from any window, including a floating one.
Default Shortcuts
Key |
Action |
|---|---|
F2 |
Turn full screen on or off |
Esc |
Leave full screen |
F5 |
Take a photo |
F6 |
Auto focus |
F7 |
Take a photo on all connected cameras |
F8 |
Run the currently loaded script |
F9 |
Go to the Barcode field in the Session window |
Ctrl+O |
Open the Options window |
On macOS, use the Command key in place of Ctrl. Depending on your keyboard settings, you may also need to hold the Fn key to use the function keys.
Changing Shortcuts
All the shortcuts except Esc can be changed in the Shortcuts tab of the Options window. It lists every action that can be given a key, grouped as follows:
Camera — take a photo, auto focus, take a photo on all connected cameras, run the script, press and release the shutter button, connect, disconnect and identify the camera, and detect cameras.
Camera property — step each camera setting up or down, such as aperture, shutter speed, ISO and white balance. Each setting has one action to step it up and one to step it down.
Live view focus — the six focus steps of the Live View focus buttons (see Focus Buttons and Mouse Wheel).
Photo — view, download, hide or unhide the selected photo, reshoot it with the same name, and activate the selected barcode.
Application — full screen, the Options window, the Barcode field, and showing each window, such as the Preview or Live View 1.
Only the default shortcuts above have a key to begin with. To give an action a key, click its box in the Key column and press the key. To remove a key, click the clear button in its box. Then press Apply or OK to keep the changes.
Each key can only be used once. If the key is already in use, it is refused, and the tab shows which action is using it.
A key pressed on its own, such as a letter or a number, doesn’t work while you are typing in a text field such as the Barcode field. The tab warns you when you choose one. Function keys, and keys pressed with Ctrl or Alt, work everywhere.
Reset Shortcuts puts back the default keys, and turns the legacy shortcuts back on.
Legacy Single-Key Shortcuts
Earlier versions of the app used single-letter shortcuts. These are still on by default:
Key |
Action |
|---|---|
T |
Take a photo |
Z |
Take a photo on all connected cameras |
F |
Auto focus |
R |
Run the currently loaded script |
A |
Select the aperture camera setting |
S |
Select the shutter speed camera setting |
I |
Select the ISO camera setting |
E |
Select the exposure compensation camera setting |
Q |
Select the photo quality camera setting |
M |
Select the metering mode camera setting |
W |
Select the white balance camera setting |
Up arrow |
Change the value of the currently selected camera setting |
Down arrow |
Change the value of the currently selected camera setting |
These keys can’t be changed, and they don’t work while you are typing in a text field. To turn them off, untick Also use the legacy single-key shortcuts in the Shortcuts tab. While they are on, their keys can’t be given to other actions.